Monday, August 29, 2011

Home, Bittersweet Home: Devastation in Woodstock, VT

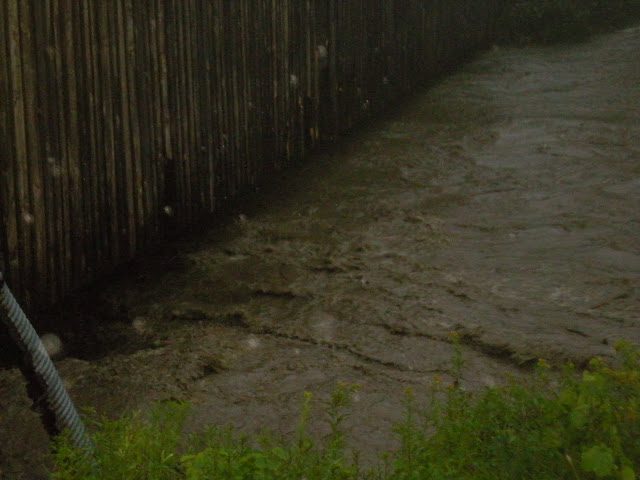
Well, looks like we chose the right week to be away... Just down the hill from our home, all roads and buildings in the lowlands have been devastated. We hear from neighbors that everything up on the hill is ok aside from no electricity or water.

The little Ottauquechee River which runs through Woodstock normally averages 2' deep and crested around 20'. Here are some photos and videos taken by friends and neighbors.

Quechee Bridge Near Simon Pearce


Propane tank floating away in Woodstock
Aftermath - Simon Pearce Restaurant, Quechee Bridge, Ottauquechee River


Aftermath - Dead River Oil Company on Rte 4 near our house

Aftermath - White Cottage Snack Bar near our house

Flooding on Rte 4


Barn in Woodstock

Aftermath - Rte 4 on the way to our house

Rte 4 flooding - Woodstock Farmer's Market, glass shop, VT Standard
Rte 4

Woodstock Farmer's Market

Rte 4

Woodstock scool playing field

Dead River propane storage facility

Lincoln Corner covered bridge

Lincoln corner covered bridge

Lincoln Corner area


Woodstock Farmer's Market & Vermont Standard


House on River St, near Rte 4 bridge in Woodstock


water rushing under Rte 4 bridge over Ottauquechee River


Aftermath - Rte 4


Aftermath - Quechee, near Simon Pearce

Historic Covered Bridge Lost To Irene - Video - WESH Orlando

Historic Covered Bridge Lost To Irene - Video - WESH Orlando

Cooks/Librarians Businesses closed down until at least 9/5

I'll be on vacation through 9/5, so I won't be filling any food or craft orders until then. See you in Sept!

Sunday, August 21, 2011

When Gluten-Free Doesn't Really Mean Free from Gluten


A cautionary reminder that despite advances, the production of gluten-free products still needs to be improved. I was glad to see that the Upper Valley's very own King Arthur Flour is listed as one of the few producers with strict quality controls in place.
Original post from In Flora's Kitchen.
*******************************
As more and more people eat gluten-free, more and more products labeled gluten-free are hitting the shelves. But what does it mean when something is labeled gluten-free?
I suppose a lot of people are misinformed and believe grains that are naturally gluten-free, say corn for example, would be gluten-free. However, how was it transported, handled, stored, milled, packaged, etc? These issues are real and all too often overlooked by companies trying to get a piece of the very lucrative gluten-free pie.
Recently I became aware of a mill (Butte Creek Mill) in my state that grinds flour, including “gluten-free” flours. However, I could not find any information on their website about how they prevented cross-contamination with their gluten-containing products. I love local, small companies, so I was eager to use their products; I emailed them via their website “contact us” form asking how they ensure the gluten-free products are gluten-free. Here is their response:
The only true gluten free items we sell in the store, are things that we have brought in from other companies (packaged items).  We only have one milling room and one packing room, so there could be a dusting of wheat on our products.  If you are celiac, we do not recommend using our products.  We do have many gluten free flours that we mill here, (rice, quinoa, corn, etc.), but once again, they could have a dusting of gluten.
Hope that helps,
Thank you.
Seriously. I was pretty annoyed with this lame response. Personally, I do not believe that companies should be able to market or label items gluten-free when they are in no way ensuring the products are in fact gluten-free. This issue is extremely important for all those with Celiac or wheat allergies and I am hoping that the FDA makes law the proposed “gluten-free” labeling rule which requires that all products labeled gluten-free have less than 20ppm. This is the standard that most countries have in effect.
The FDA is taking public comment [...] on this issue for a next several weeks and I am hoping you’ll join me and take the time to comment the importance of regulating the label “gluten-free.” For all the time, money, and effort we put into preparing safe meals for ourselves or our loved ones, I think we deserve safe products. If they are marked gluten-free, they should truly be gluten-free.
And I should mention there are companies like Bob’s Red Mill and King Arthur Flour that have precautions and testing in place to ensure the safety of consumers. These companies are going above and beyond any current regulations and I think their efforts should really be praised. Yes, their products cost a bit more than other brands on the store shelves, but when I grab one of their products I know it was batch tested and I feel they are the safest options available to me.

Thursday, August 18, 2011

8/18 Hartland Market Menu

For Dinner

  • Grilled Eggplant Veggie Roll
    • gluten-free bread, veggies, mozzarella, and fresh herbs rolled up into a yummy spiral)
For Dessert
  • Chocolate-Ginger Ice Cream Cake Pops (gluten-free)
    • a small scoop of mixed chocolate and vanilla cake, chocolate frosting, and ice cream mixed together - kind of like a great birthday party on a stick! ;-)
  • Caramel Cupcakes (gluten-free)
    • caramel-flavored cake with a gooey maple dulce de leche caramel center and vanilla icing
  • Chocolate Cupcakes (gluten-free & vegan)
  • Fudge Brownies (gluten-free; contains nuts)
Raw Snacks (gluten-free, vegan, and sugar-free; contain nuts)
Free Samples available!
  • Sun-dried Tomato Crackers
  • Fresh Zucchini & Walnut Crackers
  • Vegan "Cheesy" Kale Crackers

Wednesday, August 10, 2011

K.I.S.S. Your Kale

Kate's (GlutenfreeGobsmacked) Collard Greens recipe works just as well for that bounty of kale we're getting up here in the Northlands.


I’ve heard how “long” and “tough” it is to cook collard greens and have them turn out fabulously.  Seasoning them and making them the right texture and not having either mushy or bitter greens to serve.  And you know what?  I’m much more of a baker than a cook, so that whole “you’ll know when it’s done” thing?  Doesn’t always work for me.  Well, unless I’m grilling chicken or pork chops.  I’ve got that down.
Last week (and this week’s) CSA box had collard greens, so I bit the bullet.  I was going to prepare them and prove my Love wrong.  I was going to make simple and tasty collard greens.  And guess what?  It totally worked.  He wants more.
So tonight, with my family here visiting, we’re making grilled chicken breasts, some more KISS (Keep It Simple, Silly) Collard Greens, fresh new potatoes roasted with feta cheese and parsley and watermelon.  And for dessert?  I’m attempting a checker-board sponge cake.  (Yeap, now I’ve gone ’round the bend, huh?)
So, for those of you with greens and not southern touch to your cooking (like me), feel free to copy.  These are fabulous greens.  I’m thrilled to have an easy recipe to make collard greens with now.  And I won’t be swapping out my collards for any more carrots.  I promise.
K.I.S.S. Collard Greens
Serves two.
Ingredients
  • 1 bunch of collard greens, cleaned/washed
  • 4 cloves of garlic, mashed and minced
  • olive oil
  • salt/pepper for seasoning
  • 2 teaspoons sesame oil
  • Squeeze of lemon juice.
  • OPTIONAL/Main Dish Salad:  chopped chicken, raisins or dried cherries, toasted almonds.
Directions:
  1. Bring a pot of water (salted. optional) to a boil on the stove.  While you wait, prepare your collard greens.
  2. Cut the thick center vein/stem out of the collard greens.  Split each leaf in two.  Roll together and slice into thin strips (1/4 inch – 1/2 inch).  Cut the strips in half.  (See picture above of rolled collards that have been cut into strips.  I just sliced the rolls in half one time.)
  3. Drop the greens into the boiling water.  Boil for 6 minutes (thin slices) – 8/10 minutes for thicker slices.  Remove the collards once they have reached the “al dente” noodle stage after 6 – 10 minutes (depending on the thickness of your strips).
  4. Drain and press out the excess water.
  5. Heat a drizzle of olive oil in a pan.  Add your garlic and stir until fragrant (1 minute).  Add the greens and stir fry for 4 – 5 minutes until tender.  Drizzle with sesame oil and season with salt and pepper.  Continue over the heat until even temperature.  (The greens will remain “al dente” or just tender and not mush after such speedy cooking.) Squeeze a half a lemon over or drizzle a teaspoon of lemon juice over (or more, to taste) and toss.
  6. Serve warm as a side.  Or top with a few raisins, sliced chicken and toasted almonds to make a fabulous entree salad.

Saturday, August 6, 2011

GF & Healthy Living Website of Note: The G-Spot

I followed a link to this blogger's chocolate raspberry cupcakes and fell in love with the website. I mean, it's hard to resist the tagline: "The G-Spot: because a healthy life shouldn't be hard to find." Teehee. Plus, I adore someone who has the sense of humor to name a cupcake recipe "Straight to My Bottom."

And just in case you were really wanting that raspberry cupcake recipe, here it is:

Gluten-Free Ratio Rally: Dark Chocolate Raspberry Cupcakes

CAKE. That’s all my Gluten-Free Ratio Rally comrades had to say and I was over the moon about participating in this month’s challenge.
A refresher on the Gluten-Free Ratio Rally: The rally is a wonderful initiative kicked off by like-minded gluten-free thinkers. Our purpose is to make a food item each month that uses standard ratios for the item. This month our challenge was CAKE (I said it was CAKE, right?!) and it was hosted by Kate at Gluten Free Gobsmacked. In the past, we’ve made yummy gluten-free pancakesquick breads and even scones to name a few! [Learn more about ratios in this post.]
The ratio we were working with this time was simple:
1:1:1:1
Egg : Sugar : Flour : Butter
That is pretty much the ratio I stuck to, changing only the amount of sugar I added to the cupcakes (the extra sugar makes my ratio more like a 1:2:1:1). Maybe my sweet tooth got in the way? (Again.)
I took one of my favorite food pairings (chocolate + raspberry = true love 4eva) and made it into this little number … hope you enjoy:
Dark Chocolate Raspberry Cupcakes (makes 12 cupcakes)
Ingredients
Cupcakes
  • 1-1/4 cups (160 grams), plus 1 Tablespoon The G-Spot’s Gum-Free, Gluten-Free Baking Flour Mix
  • 3/4 teaspoon baking powder
  • 1/2 teaspoon of baking soda
  • 1/4 teaspoon of salt
  • 1/4 cup + 1 Tablespoon gluten-free cocoa powder
  • 1 stick unsalted butter
  • 1 cup granulated sugar
  • 2 eggs
  • 1/2 cup of milk
  • 1/2 Tablespoon of gluten-free vanilla
Raspberry Filling
  • 1/4 cup fresh raspberries
  • 1/4 cup raspberry fruit preserves
  • 1/2 cup granulated sugar
  • 1/8 cup cornstarch
Chocolate Icing
  • 1 stick unsalted butter
  • 1-1/2 cups powdered sugar
  • 1-1/2 teaspoons vanilla
  • 4 oz. dark chocolate, melted
  • 1/8 teaspoon salt
  • 1/4 cup heavy whipping cream
Directions
  1. Preheat the oven to 350 degrees. Grease and flour two 12-cup muffin pans or use muffin papers to line the cups.
  2. In a large bowl, combine flour, baking powder, baking soda, salt and cocoa. Set aside.
  3. In a standing mixer or large bowl with a hand mixer, cream the butter and sugar on medium speed until fluffy (about 4 – 5 minutes). Add the eggs, one at a time, until everything is combined.
  4. Combine the milk and vanilla in a small bowl, and then slowly add the milk and flour mixtures to the butter mixture, alternating between the two until both are completely added. Mix on low to medium until well combined. (Do not over-mix.)
  5. Bake for 25 minutes or until a toothpick inserted into the center comes out clean. Cool cupcakes in pans on wire racks 10 minutes. Loosen edges (unless using muffin papers), and remove to racks to cool completely.
  6. Rinse and dry raspberries. Combine fresh raspberries, fruit preserves, sugar and cornstarch in a 2 quart saucepan. Cook over low heat until thickened, stirring constantly. Cool before using.
  7. For the chocolate icing, combine butter, sugar, vanilla, melted chocolate and salt, mixing on medium speed until well combined. Add heavy whipping cream and beat until a mousse-like icing is achieved.
  8. When cupcakes have cooled, use a long serrated knife to cut a small hole out of the top of each cupcake (like this) and place tops aside. Place the cooled raspberry filling in each hole (about 1 Tablespoon – 1-1/2 Tablespoons each) and then put the tops back on the cupcakes. If you are using a pastry decorator, then prepare it by filling the tube with the chocolate icing. Squeeze over each cupcake, starting from the outside edge and circle toward the center. If you are using a pastry spatula, then spread topping evenly on each cupcake. Garnish each cupcake with a fresh raspberry, if desired.
These cupcakes really are just too much. Rich and absolutely decadent, these treats can trick even the pickiest of non-gluten-free eaters. (You know, the ones who say, “Is that gluten-free [sigh]? No, thanks, I like my gluten.”) Yeah, you’ll make them fall in love too.
Make ‘em. You won’t be sorry.

Re-post: Banana Rum Cupcakes

These cupcakes look so spectacularly yummy I decided to include Claire's full post from This Gluten-free Life. If you try the recipe, let me know how it turns out! I think it's going to be awhile before I can experiment with something for just B. and me, and I seem to be getting a lot of teetotalers at the farmers' markets. (Several people objected to my Mojito Agave Sweets this week b/c of the inclusion of rum. Sheesh. Get a life, folks. You're talking to someone who thinks 3 glasses of wine in a week is heavy drinking, it's not like I'm out to turn your children into gutter drunks.)


Banana Rum Cupcakes with Rum Glaze for the Gluten-free Ratio Rally


Soft. Fluffy. Spongey. Moist. Tender. Crumbly. Cake-y. 

Sadly, those usually aren't the first words that that come to mind to describe many gluten-free cakes I've tried from the store.  But that, up there?  That is a cupcake.  A real cupcake.  It is all of those words, to a tee.  And what is behind all of those happy descriptors?

A ratio.  A beautifully simple ratio.


Our host for the Gluten-free Ratio Rally this month is Kate of Gluten-free Gobsmacked.  She's inspired us all to make some delicious variations on white and yellow cake.  Check out her blog for her recipe for Basic White Birthday Cake (I could have used this a few weeks ago for my own birthday!) and for links to all of the other fantastic recipes the members of the Rally came up with (which you can also find at the end of this post).


Sometimes the ratios that Ruhlman describes need a little tweaking.  A few adjustments; a little less flour here, a little more liquid there, an extra egg here, a dash more sugar there.  But for me, his ratio for sponge cake worked perfectly.  One equal part each of flour, butter, sugar, and egg gave me a cake with an incredibly tender crumb, and a beautifully brown and spongey top.  It tasted like real cake - the kind I remember from my gluten days (you know, the kind that made me sick, but was delicious - but that's beside the point.)

Of course, I had to do SOME kind of tweaking to make it my own.  One of my absolute favorite cakes ever is my great aunt Gene's rum cake. (Whenever I see the cover of the cookbook Heirloom Baking with the Brass Sisters, I always think of aunt Gene and rum cakes, for some reason - I think it makes me think of other, older times and places and scraps of paper tucked between the tattered pages of cookbooks, holding the keys to unlock the secrets of the most delicious things your family has passed down.)  I wanted to make a cake I could drizzle her rum glaze over, so I used some banana in place of half the butter to balance out the rum flavor (which also had the added advantage of making it a lower-fat cake).

The result was absolutely heavenly.  These are best served warm, so either drizzle the glaze over them while they're still cooling and consume right away, or store refrigerated and then reheat them in the microwave for 20 - 30 seconds before serving.  Cold, they are still pretty delicious, but they are a bit harder.  Warmed up, they practically melt in your mouth.  I was both sad and very, very glad that I had used the ratio to make only 4 cupcakes.  I shudder to think of myself in the alternate scenario, which would likely have resulted in my eating a full dozen of these.  That's another reason ratios are awesome - you can make as many - or as few - as you like.


Trust me, you will not be sorry you made these.  The commitment is minimal anyway - you can just make 4 to start and see how you like them.  It's perfect for girls living alone, or for you and just a few friends.  I'm pretty sure you'll want to get right back into your kitchen to make more, though.  It's hard to resist an old-fashioned favorite like rum cake.

Banana Rum Cupcakes with Rum Glaze
Makes 4 cupcakes - can easily be doubled, tripled, or quadrupled, or...you get the idea.

For the cupcakes:
25 grams Earth Balance Buttery Spread
25 grams very ripe banana (about 1/4 medium banana)
50 grams white sugar
1 egg
1/2 tsp. vanilla
1/4 tsp. rum extract
20 grams potato starch
15 grams tapioca starch
15 grams sorghum flour
1/2 tsp. baking powder
1/4 tsp. salt
1/8 tsp. xanthan gum (probably optional, but I didn't try the recipe without it)

For the rum glaze:
1 tsp. Earth Balance Buttery Spread
2 tsp. water
1.5 tbsp. white sugar
1/2 tsp. rum extract

Preheat the oven to 350 F.  Place 4 cupcake liners in a muffin/cupcake pan.

In a mixing bowl, combine the Earth Balance Buttery Spread and the banana.  Whisk together until smooth, then add the sugar and mix well.  Add the egg, vanilla, and rum extract and beat together.

In a separate small bowl, combine the tapioca starch, potato starch, sorghum flour, baking powder, salt, and xanthan gum.  Add to the wet ingredients and mix well.

Pour into the prepared cupcake liners and bake at 350 F for 15 - 17 minutes or until a toothpick or knife inserted into the cupcake comes out clean.  Mine took exactly 17 minutes.

Remove from the oven and let sit in the hot muffin pan for another 3 - 5 minutes (so they don't fall apart when you take them out).  Remove to a cooling rack and let cool the rest of the way, or until you can't stand it anymore and have to eat one.  When they are totally cool, poke a bunch of holes in the top with a fork and drizzle a good amount of rum glaze over the top so that it sinks into the cupcake.

Store in the fridge until ready to serve.  Microwave for a few seconds before serving.

To make rum glaze:  Combine the butter, water, sugar, and rum extract in a small saucepan and bring to a simmer.  Continue to simmer for 1 - 3 minutes or until it just starts to get thick.  Drizzle over the cooled cupcakes immediately (or it will get too thick to drizzle). 

Re-post: Banana Rum Cupcakes

These cupcakes look so spectacularly yummy I decided to include Claire's full post from This Gluten-free Life. If you try the recipe, let me know how it turns out! I think it's going to be awhile before I can experiment with something for just B. and me, and I seem to be getting a lot of teetotalers at the farmers' markets. (Several people objected to my Mojito Agave Sweets this week b/c of the inclusion of rum. Sheesh. Get a life, folks. You're talking to someone who thinks 3 glasses of wine in a week is heavy drinking, it's not like I'm out to turn your children into gutter drunks.)


Banana Rum Cupcakes with Rum Glaze for the Gluten-free Ratio Rally


Soft. Fluffy. Spongey. Moist. Tender. Crumbly. Cake-y.  

Sadly, those usually aren't the first words that that come to mind to describe many gluten-free cakes I've tried from the store.  But that, up there?  That is a cupcake.  A real cupcake.  It is all of those words, to a tee.  And what is behind all of those happy descriptors?

A ratio.  A beautifully simple ratio.


Our host for the Gluten-free Ratio Rally this month is Kate of Gluten-free Gobsmacked.  She's inspired us all to make some delicious variations on white and yellow cake.  Check out her blog for her recipe for Basic White Birthday Cake (I could have used this a few weeks ago for my own birthday!) and for links to all of the other fantastic recipes the members of the Rally came up with (which you can also find at the end of this post).


Sometimes the ratios that Ruhlman describes need a little tweaking.  A few adjustments; a little less flour here, a little more liquid there, an extra egg here, a dash more sugar there.  But for me, his ratio for sponge cake worked perfectly.  One equal part each of flour, butter, sugar, and egg gave me a cake with an incredibly tender crumb, and a beautifully brown and spongey top.  It tasted like real cake - the kind I remember from my gluten days (you know, the kind that made me sick, but was delicious - but that's beside the point.)

Of course, I had to do SOME kind of tweaking to make it my own.  One of my absolute favorite cakes ever is my great aunt Gene's rum cake. (Whenever I see the cover of the cookbook Heirloom Baking with the Brass Sisters, I always think of aunt Gene and rum cakes, for some reason - I think it makes me think of other, older times and places and scraps of paper tucked between the tattered pages of cookbooks, holding the keys to unlock the secrets of the most delicious things your family has passed down.)  I wanted to make a cake I could drizzle her rum glaze over, so I used some banana in place of half the butter to balance out the rum flavor (which also had the added advantage of making it a lower-fat cake).

The result was absolutely heavenly.  These are best served warm, so either drizzle the glaze over them while they're still cooling and consume right away, or store refrigerated and then reheat them in the microwave for 20 - 30 seconds before serving.  Cold, they are still pretty delicious, but they are a bit harder.  Warmed up, they practically melt in your mouth.  I was both sad and very, very glad that I had used the ratio to make only 4 cupcakes.  I shudder to think of myself in the alternate scenario, which would likely have resulted in my eating a full dozen of these.  That's another reason ratios are awesome - you can make as many - or as few - as you like.


Trust me, you will not be sorry you made these.  The commitment is minimal anyway - you can just make 4 to start and see how you like them.  It's perfect for girls living alone, or for you and just a few friends.  I'm pretty sure you'll want to get right back into your kitchen to make more, though.  It's hard to resist an old-fashioned favorite like rum cake.

Banana Rum Cupcakes with Rum Glaze
Makes 4 cupcakes - can easily be doubled, tripled, or quadrupled, or...you get the idea.

For the cupcakes:
25 grams Earth Balance Buttery Spread
25 grams very ripe banana (about 1/4 medium banana)
50 grams white sugar
1 egg
1/2 tsp. vanilla
1/4 tsp. rum extract
20 grams potato starch
15 grams tapioca starch
15 grams sorghum flour
1/2 tsp. baking powder
1/4 tsp. salt
1/8 tsp. xanthan gum (probably optional, but I didn't try the recipe without it)

For the rum glaze:
1 tsp. Earth Balance Buttery Spread
2 tsp. water
1.5 tbsp. white sugar
1/2 tsp. rum extract

Preheat the oven to 350 F.  Place 4 cupcake liners in a muffin/cupcake pan.

In a mixing bowl, combine the Earth Balance Buttery Spread and the banana.  Whisk together until smooth, then add the sugar and mix well.  Add the egg, vanilla, and rum extract and beat together.

In a separate small bowl, combine the tapioca starch, potato starch, sorghum flour, baking powder, salt, and xanthan gum.  Add to the wet ingredients and mix well.

Pour into the prepared cupcake liners and bake at 350 F for 15 - 17 minutes or until a toothpick or knife inserted into the cupcake comes out clean.  Mine took exactly 17 minutes.

Remove from the oven and let sit in the hot muffin pan for another 3 - 5 minutes (so they don't fall apart when you take them out).  Remove to a cooling rack and let cool the rest of the way, or until you can't stand it anymore and have to eat one.  When they are totally cool, poke a bunch of holes in the top with a fork and drizzle a good amount of rum glaze over the top so that it sinks into the cupcake.

Store in the fridge until ready to serve.  Microwave for a few seconds before serving.

To make rum glaze:  Combine the butter, water, sugar, and rum extract in a small saucepan and bring to a simmer.  Continue to simmer for 1 - 3 minutes or until it just starts to get thick.  Drizzle over the cooled cupcakes immediately (or it will get too thick to drizzle).