Monday, November 21, 2011

Turkey, Cheddar and Apple Hand Pies and more fresh ideas for the holidays

Wow, great ideas for holiday meals - on the Etsy Blog of all places!

Turkey, Cheddar and Apple Hand Pies

continentaldrift
So often in the kitchen, what I cook is a success. Even if it isn’t amazing to look at, it’s at least decent to eat. This tendency toward success may be giving me an inflated sense of bravado. (It may also explain why I love cooking so much: we gravitate towards what we’re good at, yes?) So, when I have a kitchen fail, I often panic, losing any sense of humor or grace. Such was the case yesterday, attempting and failing, again, with pie crust.
Pie crust eludes me like nothing else. Part of this, I believe, is because it is a rather fussy bit of pastry; it’s demanding and technique-driven, where I am partial to the unfussy and definitelynot technique-driven in the kitchen. I love to make things that allow for a little breathing room, a little flexibility. Pie crust, it seems, is the opposite of that.
Kimberley Hasselbrink
The purpose of this pie crust was to make some mini-turkey pot pies: the perfect vehicle for leftovers following Thanksgiving. But, well, that’s not happening. After another year of uncooperative crust, I think pie and me are through. Plan B, in lieu of the perfect crust, is a simple hand pie, made with pizza dough, that has a filling not unlike pot pie, but is easier to make and a little bit healthier too. (Following a feast the size of Thanksgiving, something that’s a little bit healthier isn’t going to hurt anybody.) What I love about these little pies is how flexible they are: you can fill them with any Thanksgiving leftover you desire, be it stuffing, cranberry sauce, sweet potatoes or green beans. Tuck in some turkey meat and a little cheese, bake them for about 20 minutes, and you’re all set.
Kimberley Hasselbrink
Turkey, Cheddar and Apple Hand Pies
Whole wheat pizza dough (pre-made or following this recipe)
1 tablespoon unsalted butter
1 medium yellow onion, diced
1 cup baby spinach leaves
1 cup roasted and diced turkey meat
1 medium, crisp apple, diced
1 cup shredded sharp cheddar
1 tablespoon fresh thyme, minced
1 tablespoon fresh sage, minced
Salt and pepper to taste
Preheat oven to 400 degrees.
If using chilled pizza dough, allow to come to room temperature for about an hour.
Kimberley Hasselbrink
Warm the butter in a skillet over a medium low flame. Saute the onion, stirring occasionally, until caramelized, about ten minutes. Add spinach and stir to wilt the leaves, about two minutes. Remove from heat and transfer to a medium bowl. Add the turkey meat, diced apple, cheddar cheese, thyme and sage and stir to combine. Season with salt and pepper to your liking. Set aside.
On a floured surface, roll the pizza dough into a large square, roughly 12×12 inches. Divide into 16 squares about 3×3 inches. Place the squares on a large, lightly oiled baking sheet.
Kimberley Hasselbrink
Using a spoon or your hands, portion a generous tablespoon of the filling in the center of each square.
Fold one edge of the square over the other, forming a triangle. Fold and pinch the edges together to seal. Pierce the top with a fork. Brush the surface with a little olive oil, and finish with a sprinkle of sea salt.
Bake in the oven until the crust is golden brown, about 20 minutes. Best enjoyed hot. Can be reheated. They freeze well.
Kimberley Hasselbrink
And if you’re looking for Thanksgiving inspiration, I wanted to share some of my favorite Thanksgiving recipes with you:
Kimberley Hasselbrink
Spiced Sweet Potato Latkes
Kimberley Hasselbrink
Kale and Persimmon Salad
Kimberley Hasselbrink
Brussel Sprouts with Parmesan and Lemon
Kimberley Hasselbrink
Apple, Pear and Cranberry Crisp
And as for the bird itself, last year I employed this brine and an unfussy roasting method with great success! Best of luck on the big day! Here’s to our failures making us better.

What’s your most memorable snafu in the kitchen?
Kimberley Hasselbrink is a food photographer and blogger based in San Francisco. She is the author of the blog The Year in Food, which is framed around a monthly seasonal food guide. Kimberley enjoys unusual produce, strong coffee, road trips and summer nights.

Sunday, November 13, 2011

Carrot Pie

Thanks to UVLocalvore's great idea for using up the wonderful bounty of carrots provided by our local CSAs this fall! After we finish the Almond Flour Carrot Cake and Morning Glory muffins I made the other day, this will be my next carrot project. I'm thinking I could make a savory version, too, substituting cumin and some other Mexican spices and a little ground turkey (kind of like Shepherd's Pie).


Maple Carrot Pie
1 1/3 cups steamed, mashed carrots
1/2 cup + 2 Tablespoons maple syrup
1 1/4 cup milk
2 eggs
1 T. flour
1 1/2 tsp. cinnamon
1 tsp. nutmeg
1/2 tsp. powdered ginger
1/2 tsp. salt
1 uncooked 9-inch pie shell
Blend all ingredients. Pour into pie shell. Bake at 350 degrees F for 45 minutes or until firm in the middle. Serve with local whipped cream or ice cream.


Full original post at:
UVLocalvores

Sunday, October 30, 2011

Flourless Chocolate Chip Oatmeal Cookies

Flourless Chocolate Chip Oatmeal Cookies

Mmm, these sound just scrumptious. I love that figs and sunflower butter are used to bind everything together.

Flourless Chocolate Chip Oatmeal Cookies
Makes about 3 dozen medium cookies

1.5 tbsp. Earth Balance Buttery Spread 
1/4 cup fig butter
1/2 cup white sugar
1/2 cup brown sugar
1/2 cup sunflower butter (or peanut butter)
2 tsp. vanilla extract
1 egg 
1/2 tsp. salt
1 tsp. baking powder
2 cups gluten-free oats
5 tbsp. unsalted roasted sunflower seeds
3/4 - 1 cup chocolate chips

Preheat the oven to 350 F.  Line two cookie sheets with parchment paper.

Whip together the Earth Balance, fig butter, and white and brown sugar until well-mixed.  Add the egg and mix together well.  Add in the sunflower butter or peanut butter (depending on your own taste/tolerance) and vanilla.

In a separate bowl, combine the oats, baking powder, and salt.  Stir them into the wet ingredients and mix well.  Add the sunflower seeds and chocolate chips and stir in to combine.

Scoop the cookies out by the teaspoonful or tablespoonful onto the cookie sheets and space 2 inches apart. Bake for 8 - 10 minutes (JUST until they start to brown on the edges), then remove from the oven.  They probably won't look completely done - that's ok.  Let them sit on the hot cookie sheet for another 3 - 5 minutes or until you can scrape them off onto a wire rack without their falling apart.  Cool completely, then store in an airtight container until ready to serve.


Originally posted at:
http://www.thisglutenfreelife.org/2011/10/flourless-chocolate-chip-oatmeal.html

Monday, October 17, 2011

Upper Valley Localvores: Maple-Applesauce-Carrot-Walnut Muffins

I am absolutely loving following the posts of UVLocalvores. It's great to hear about who's selling what at the local farmers' markets, and wonderful recipes shared, as well! I have a ton of carrots from Fable Farm in Barnard, as well as a bucket of walnuts left over from my own summer farmers' market products, so the following recipe from UVLocalvores is perfect! I'll substitute GF flour to make the muffins edible by the spouse.

Maple-Applesauce-Carrot-Walnut Muffins
1 cup flour (I used Butterworks organic whole wheat bread flour)
1/2 teaspoon baking soda
1/2 teaspoon cinnamon
1/4 teaspoon baking powder
1/8 teaspoon nutmeg
1/8 teaspoon salt
1 local organic egg
1/3 cup maple syrup
1/2 cup organic applesauce
1/4 cup coconut oil* or olive oil (I was leery of olive oil but it was fine!)
1 teaspoon vanilla
1/2 cup local organic carrots, shredded
1/2 cup walnuts, chopped
1/2 cup organic raisins (or cranberries?)
Preheat oven to 400 degrees. Grease and flour 18 mini muffin cups. (Hmmm – I did a half recipe; it made a dozen mini muffins.)
In a mixing bowl; mix the egg and maple syrup together. Add the apple sauce, oil and vanilla. Mix until combined.
In a medium bowl, whisk together the flour, baking soda, cinnamon, baking powder, nutmeg and salt. Add the flour ingredients to the egg mixture. Mix until thoroughly combined.
Add the carrots, walnuts and raisins. Mix just until combined.
Spoon the batter into the prepared mini muffin cups.
Bake for 11 minutes at 400 Degrees.

Sunday, October 16, 2011

Our Favorite Mojito Recipe


Cuban Mojito recipethe original authentic recipe from Havana Cuba
1 teaspoon powdered sugar
Juice from 1 lime (2 ounces)
4 mint leaves
1 sprig of mint
Havana Club white Rum (2 ounces)
2 ounces club soda
 
There are countless recipes for the Mojito (pronounced moh-HEE-toh), but this version is for the one Hemingway himself enjoyed at the Mojito's place of birth: La Bodeguita del Medio in Havana, Cuba. If you are throwing a Cuban theme party (Havana night themed party), definitely plan on serving mojitos.

Place the mint leaves into a long mojito glass (often called a "collins" glass) and squeeze the juice from a cut lime over it. You'll want about two ounces of lime juice, so it may not require all of the juice from a single lime.

Add the powdered sugar, then gently smash the mint into the lime juice and sugar with a muddler (a long wooden device pictured below, though you can also use the back of a fork or spoon if one isn't available). Add ice (preferably crushed) then add the rum and stir, and top off with the club soda (you can also stir the club soda in as per your taste). Garnish with a mint sprig.

Friday, October 14, 2011

(SERIAL)KILLER PUMPKIN MASH

OK, this recipe post is from a few years ago, but I thought I'd put it up again since Halloween is coming up and we are planning a pumpkin-carving party for this weekend. Enjoy, mwahahahahhah!
***********
We live off the beaten path in a development peopled mostly by retirees, so we don’t get trick-or-treaters.  But I love Halloween and dressing up and doing spooky stuff. So, even though it was a work night and we’d gotten our official Halloween party-going done the weekend before, I decided I still had to make a night of it. I dressed up in black, lit some candles, turned on Bach’s Toccata and Fugue, and set about cooking up something really grisly!
What transpired (“expired”!?) was our first ever Pumpkin Dismemberment Party and the invention of “(SERIAL)KILLER” PUMPKIN MASH. (We've been working our way through the first season of "Dexter" on Netflix...)

We lovingly created Smokin’ Jack, our angry little jack-o-lantern, tried (and failed) to set him on fire (we didn’t realize both the food and the alcohol had to be hot for flambéing), cooked him, dismembered him, mashed him, and later ate him while watching our next “Dexter” DVD. Heh.

This recipe will work well for Thanksgiving, too. Stressed out at the idea of having to dine with family? Buy a half dozen pie pumpkins and vent your frustrations while making your very own “KILLER” PUMPKIN MASH! Just think how fun it will be to carve a pumpkin that looks just like your annoying weasel of a brother…and how satisfying to gut, burn, dismember, and pulp the insufferable little bugger! By the time your family Turkey Day celebration gets into full swing, you’ll have blown off all that steam. Plus, you’ll get to cackle maniacally as you dish out a dollop of your delicious evil-doing to each member of your family…

Haha. Well, enough of that. Here’s the “recipe. “ Be forewarned, I made this up as I went, so the amounts are only estimates. If you are doing this with kids, PLEASE skip the fire part!!

mashed pumpkin from 1 medium pie pumpkin
¾ -1 cup whole milk (use  ½ and ½ or cream for a richer taste)
¼ cup B grade maple syrup (the real stuff!)
¼ cup salted margarine or butter
2 tablespoons vegetable oil
1 tablespoon cinnamon
½ teaspoon nutmeg
toasted slivered almonds
dark brown sugar
spiced rum

1.       Cover your entire kitchen (except the stove and other hot bits) in plastic wrap and sheeting, ala “Dexter”. This makes for easy cleaning, but is not very environmentally friendly. If you are concerned about the environment, buy that plastic stuff that’s made out of wheat field stubble or corn cellulose or whatever. (Lots of handy products for the eco-minded squash killer can be found in the reference section of this blog…)
2.       Draw your face of choice on your victim, AKA “a medium pie pumpkin”.
3.       Carefully insert a sturdy knife into the top (“stem side”) of the victim’s head, cutting out a round section.
4.        Scoop guts (brains?) out and set aside. (Use for pumpkin seed snacks or compost. The worms in my two worm composting bins just love squash guts.)
5.       Carve your victim’s face. Show no mercy - all pumpkins deserve ultimate pain and terror! Hahahahahahah!!! Die, pumpkins, die!!!!! Erhem…
6.       Preheat oven to 375°F. Set the carved and bleeding victim on a tray. Give a nice little tour of the baking facilities while taunting and telling how the victim’s just won a visit to your primo tanning bed…oil the cavity inside the victim’s hollow carved head with the veg oil and…
7.       Bake victim for about 1½  hours. Victim is “done” when he starts slumping dejectedly and looks slightly charred on top. When poked with a fork, victim should feel squishy. (After the first 45 minutes, check pumpkin for doneness every 15 minutes. Depending on the size of your oven, stature of your pumpkin, and amount of flesh you’ve carved away, the pumpkin may need more or less time to cook.)
8.       Take victim outside while still smokin’ hot. Set on a fire-proof surface.  Follow instructions for flambéing, such as those provided by Food24. Pour flaming alcohol into the carved-out cavity and STEP BACK. Victim should burn for a few minutes, nicely searing flesh inside to a golden brown. Clap a lid over the victim before he’s charred into a pun’kin-puck.
9.       (Optional: if you can’t get your pumpkin to light, just go on to the next step. Then put the dismembered pieces back in the oven on an oiled tray - flesh side down - and bake for another 20 minutes.)
10.   Allow victim to cool in the night air for several minutes. Just when the victim starts beginning to think he might get out of this alive, haul him back inside and quickly hack him into pieces with a cleaver or large carving knife. Cackling insanely all the while, of course.
11.   Peel skin from cooked, dismembered flesh. Put flesh in a large mixing bowl and violently mash to an even consistency. This part is very satisfying! Just try not to break any crockery, cooking implements, or countertops with the force of your blows.
12.   Add butter, cinnamon, and nutmeg and mix wildly, spattering bits of flesh all over your carefully plastic-wrapped kitchen.
13.   Add maple syrup and milk. Fling more mashed flesh around - though not too much, or you won’t have enough for later.
14.   Scoop resulting pumpkin pulp into individual serving bowls.
15.   Garnish with a generous splash of spiced rum, dark brown sugar, and slivered almonds.
16.   Serve to your horrified family/friends/housemates.
17.   Eat the evidence!

Monday, September 5, 2011

Sustainable Woodstock: Community Updates, Flood Relief Fund, and more

It has been a long week in Woodstock. Dealing with the results of Sunday's flooding has been exhausting, but the outpouring of support from everywhere has been amazing. Loss of power, water or access affected many residents, but the devastation of some homes, roads and businesses affected everyone in our community. And countless individuals have worked tirelessly on relief efforts and on keeping our community operational. As a result of their efforts, we’re making progress.

Many people have asked about volunteer opportunities. A “command center” at the Woodstock Elementary School has been directing individuals to areas where help is needed the most. Much of the initial work included delivery of water and supplies, assessment of needs and some cleanup. This work will continue through the weekend starting at 10:00 am each day. For cleanup duties, people should wear boots and bring rakes and shovels. Dust masks and gloves will be provided. All volunteers MUST sign in at the elementary school. This is a requirement for FEMA funding.

Updated information on relief efforts is available on the Town website under the heading "hurricane updates."

To keep updated on other local news, you can follow the Woodstock Early Bird blog or the "Woodstock VT Flood Response" page on Facebook. The Vermont Standard will be published today (Friday) and you can find current articles on their website.

And please consider donating to The Woodstock Area (VT) Flood Relief Fund.  Sustainable Woodstock has joined with other community members to establish this fund to provide emergency assistance to those in need. More details on the fund below.

Thank you for your continued interest and support.

Sally Miller
Director


The Woodstock Area (VT) Flood Relief Fund

Purpose of the fund: This fund provides assistance to residents of the greater Woodstock area who need help securing basic necessities like food, medicine, shelter, and clothing and losses related to Hurricane Irene.

In its initial phase, the fund will direct its resources to the emergency survival needs of people who are most vulnerable, based on age, physical condition, general life circumstances, and the extent of loss.

After responding to the immediate crisis of the flood, and depending on monies available, the fund will consider requests for additional support from eligible persons who need assistance to rebuild their homes and reestablish their lives.

To receive financial support: The fund will consider requests for support from residents of Barnard, Bridgewater, Pomfret, Reading, South Woodstock, Taftsville, and Woodstock for flood-related needs.

Please contact Sustainable Woodstock for an application via email or phone or by stopping at the office.  (Sally Miller, director, and volunteers are only in the office part-time, so please understand that someone may not always be available immediately. We’ll respond as quickly as possible.) 

Phone:  802-457-2911
E-mail: spm@sustainablewoodstock.com
Office:  32 Pleasant Street

To donate to the fund:
  • By check:  Make your check payable to Sustainable Woodstock. Please put Flood Relief Fund in the memo line. Mail it to Sustainable Woodstock, PO Box 611, Woodstock, VT 05091. Or deliver your check to the Sustainable Woodstock office at 32 Pleasant Street or to the Bond Street office of Lake Sunapee Bank.
  • Online: You can donate online directly to this fund through Sustainable Woodstock’s secure website.
How the fund is managed:  Sustainable Woodstock, a 501(c)(3) organization, administers the fund.  All donations are tax-deductible to the extent allowed by federal law.  A committee that includes Sustainable Woodstock officers and community representatives will review funding requests to assess eligibility and priorities. Every effort will be made to provide assistance as quickly as possible, so that emergency needs can be met. 

Monday, August 29, 2011

Home, Bittersweet Home: Devastation in Woodstock, VT

Well, looks like we chose the right week to be away... Just down the hill from our home, all roads and buildings in the lowlands have been devastated. We hear from neighbors that everything up on the hill is ok aside from no electricity or water.

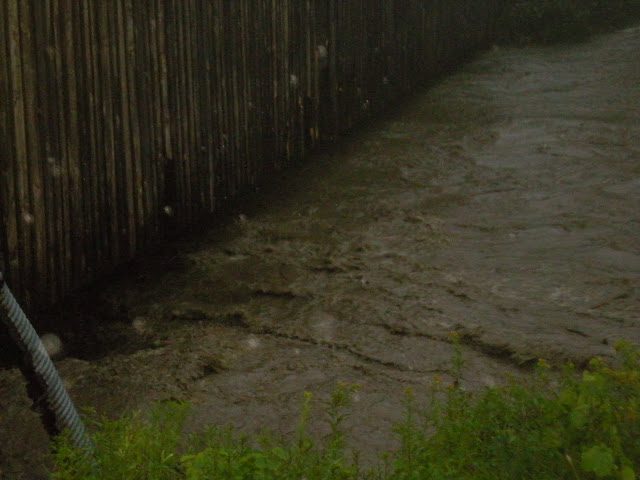
The little Ottauquechee River which runs through Woodstock normally averages 2' deep and crested around 20'. Here are some photos and videos taken by friends and neighbors.

Quechee Bridge Near Simon Pearce


Propane tank floating away in Woodstock
Aftermath - Simon Pearce Restaurant, Quechee Bridge, Ottauquechee River


Aftermath - Dead River Oil Company on Rte 4 near our house

Aftermath - White Cottage Snack Bar near our house

Flooding on Rte 4


Barn in Woodstock

Aftermath - Rte 4 on the way to our house

Rte 4 flooding - Woodstock Farmer's Market, glass shop, VT Standard
Rte 4

Woodstock Farmer's Market

Rte 4

Woodstock scool playing field

Dead River propane storage facility

Lincoln Corner covered bridge

Lincoln corner covered bridge

Lincoln Corner area


Woodstock Farmer's Market & Vermont Standard


House on River St, near Rte 4 bridge in Woodstock


water rushing under Rte 4 bridge over Ottauquechee River


Aftermath - Rte 4


Aftermath - Quechee, near Simon Pearce

Historic Covered Bridge Lost To Irene - Video - WESH Orlando

Historic Covered Bridge Lost To Irene - Video - WESH Orlando

Cooks/Librarians Businesses closed down until at least 9/5

I'll be on vacation through 9/5, so I won't be filling any food or craft orders until then. See you in Sept!

Sunday, August 21, 2011

When Gluten-Free Doesn't Really Mean Free from Gluten


A cautionary reminder that despite advances, the production of gluten-free products still needs to be improved. I was glad to see that the Upper Valley's very own King Arthur Flour is listed as one of the few producers with strict quality controls in place.
Original post from In Flora's Kitchen.
*******************************
As more and more people eat gluten-free, more and more products labeled gluten-free are hitting the shelves. But what does it mean when something is labeled gluten-free?
I suppose a lot of people are misinformed and believe grains that are naturally gluten-free, say corn for example, would be gluten-free. However, how was it transported, handled, stored, milled, packaged, etc? These issues are real and all too often overlooked by companies trying to get a piece of the very lucrative gluten-free pie.
Recently I became aware of a mill (Butte Creek Mill) in my state that grinds flour, including “gluten-free” flours. However, I could not find any information on their website about how they prevented cross-contamination with their gluten-containing products. I love local, small companies, so I was eager to use their products; I emailed them via their website “contact us” form asking how they ensure the gluten-free products are gluten-free. Here is their response:
The only true gluten free items we sell in the store, are things that we have brought in from other companies (packaged items).  We only have one milling room and one packing room, so there could be a dusting of wheat on our products.  If you are celiac, we do not recommend using our products.  We do have many gluten free flours that we mill here, (rice, quinoa, corn, etc.), but once again, they could have a dusting of gluten.
Hope that helps,
Thank you.
Seriously. I was pretty annoyed with this lame response. Personally, I do not believe that companies should be able to market or label items gluten-free when they are in no way ensuring the products are in fact gluten-free. This issue is extremely important for all those with Celiac or wheat allergies and I am hoping that the FDA makes law the proposed “gluten-free” labeling rule which requires that all products labeled gluten-free have less than 20ppm. This is the standard that most countries have in effect.
The FDA is taking public comment [...] on this issue for a next several weeks and I am hoping you’ll join me and take the time to comment the importance of regulating the label “gluten-free.” For all the time, money, and effort we put into preparing safe meals for ourselves or our loved ones, I think we deserve safe products. If they are marked gluten-free, they should truly be gluten-free.
And I should mention there are companies like Bob’s Red Mill and King Arthur Flour that have precautions and testing in place to ensure the safety of consumers. These companies are going above and beyond any current regulations and I think their efforts should really be praised. Yes, their products cost a bit more than other brands on the store shelves, but when I grab one of their products I know it was batch tested and I feel they are the safest options available to me.

Thursday, August 18, 2011

8/18 Hartland Market Menu

For Dinner

  • Grilled Eggplant Veggie Roll
    • gluten-free bread, veggies, mozzarella, and fresh herbs rolled up into a yummy spiral)
For Dessert
  • Chocolate-Ginger Ice Cream Cake Pops (gluten-free)
    • a small scoop of mixed chocolate and vanilla cake, chocolate frosting, and ice cream mixed together - kind of like a great birthday party on a stick! ;-)
  • Caramel Cupcakes (gluten-free)
    • caramel-flavored cake with a gooey maple dulce de leche caramel center and vanilla icing
  • Chocolate Cupcakes (gluten-free & vegan)
  • Fudge Brownies (gluten-free; contains nuts)
Raw Snacks (gluten-free, vegan, and sugar-free; contain nuts)
Free Samples available!
  • Sun-dried Tomato Crackers
  • Fresh Zucchini & Walnut Crackers
  • Vegan "Cheesy" Kale Crackers

Wednesday, August 10, 2011

K.I.S.S. Your Kale

Kate's (GlutenfreeGobsmacked) Collard Greens recipe works just as well for that bounty of kale we're getting up here in the Northlands.


I’ve heard how “long” and “tough” it is to cook collard greens and have them turn out fabulously.  Seasoning them and making them the right texture and not having either mushy or bitter greens to serve.  And you know what?  I’m much more of a baker than a cook, so that whole “you’ll know when it’s done” thing?  Doesn’t always work for me.  Well, unless I’m grilling chicken or pork chops.  I’ve got that down.
Last week (and this week’s) CSA box had collard greens, so I bit the bullet.  I was going to prepare them and prove my Love wrong.  I was going to make simple and tasty collard greens.  And guess what?  It totally worked.  He wants more.
So tonight, with my family here visiting, we’re making grilled chicken breasts, some more KISS (Keep It Simple, Silly) Collard Greens, fresh new potatoes roasted with feta cheese and parsley and watermelon.  And for dessert?  I’m attempting a checker-board sponge cake.  (Yeap, now I’ve gone ’round the bend, huh?)
So, for those of you with greens and not southern touch to your cooking (like me), feel free to copy.  These are fabulous greens.  I’m thrilled to have an easy recipe to make collard greens with now.  And I won’t be swapping out my collards for any more carrots.  I promise.
K.I.S.S. Collard Greens
Serves two.
Ingredients
  • 1 bunch of collard greens, cleaned/washed
  • 4 cloves of garlic, mashed and minced
  • olive oil
  • salt/pepper for seasoning
  • 2 teaspoons sesame oil
  • Squeeze of lemon juice.
  • OPTIONAL/Main Dish Salad:  chopped chicken, raisins or dried cherries, toasted almonds.
Directions:
  1. Bring a pot of water (salted. optional) to a boil on the stove.  While you wait, prepare your collard greens.
  2. Cut the thick center vein/stem out of the collard greens.  Split each leaf in two.  Roll together and slice into thin strips (1/4 inch – 1/2 inch).  Cut the strips in half.  (See picture above of rolled collards that have been cut into strips.  I just sliced the rolls in half one time.)
  3. Drop the greens into the boiling water.  Boil for 6 minutes (thin slices) – 8/10 minutes for thicker slices.  Remove the collards once they have reached the “al dente” noodle stage after 6 – 10 minutes (depending on the thickness of your strips).
  4. Drain and press out the excess water.
  5. Heat a drizzle of olive oil in a pan.  Add your garlic and stir until fragrant (1 minute).  Add the greens and stir fry for 4 – 5 minutes until tender.  Drizzle with sesame oil and season with salt and pepper.  Continue over the heat until even temperature.  (The greens will remain “al dente” or just tender and not mush after such speedy cooking.) Squeeze a half a lemon over or drizzle a teaspoon of lemon juice over (or more, to taste) and toss.
  6. Serve warm as a side.  Or top with a few raisins, sliced chicken and toasted almonds to make a fabulous entree salad.